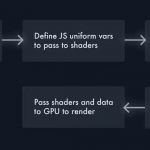
我最近对引人入胜的渐变背景非常感兴趣。大多数销售产品的网站都是相对静态的,在 Javascript 中创建动画背景渐变效果有助于提高用户参与度。最近我正在尝试为我正在处理的项目网站创建引人注目的背景渐变效果。我想要的效果应该是 a) 简单,b) 随机 和 c) 微妙。最终结果如下图:
import * as THREE from 'https://cdn.skypack.dev/three@v0.122.0';

function randomInteger(min, max) {
    return Math.floor(Math.random() * (max - min + 1)) + min;
}

function rgb(r, g, b) {
    return new THREE.Vector3(r, g, b);
}
document.addEventListener("DOMContentLoaded", function(e) {

    const renderer = new THREE.WebGLRenderer();
    renderer.setSize( window.innerWidth, window.innerHeight );
    document.body.appendChild( renderer.domElement )

    const scene = new THREE.Scene();
    const camera = new THREE.PerspectiveCamera( 75, window.innerWidth / window.innerHeight, 0.1, 1000 );

    let vCheck = false;

    camera.position.z = 5;

    var randomisePosition = new THREE.Vector2(1, 2);

    var R = function(x, y, t) {
        return( Math.floor(192 + 64*Math.cos( (x*x-y*y)/300 + t )) );
    }

    var G = function(x, y, t) {
        return( Math.floor(192 + 64*Math.sin( (x*x*Math.cos(t/4)+y*y*Math.sin(t/3))/300 ) ) );
    }

    var B = function(x, y, t) {
        return( Math.floor(192 + 64*Math.sin( 5*Math.sin(t/9) + ((x-100)*(x-100)+(y-100)*(y-100))/1100) ));
    }
    let sNoise = document.querySelector('#snoise-function').textContent
    let geometry = new THREE.PlaneGeometry(window.innerWidth / 2, 400, 100, 100);
    let material = new THREE.ShaderMaterial({
        uniforms: {
            u_bg: {type: 'v3', value: rgb(162, 138, 241)},
            u_bgMain: {type: 'v3', value: rgb(162, 138, 241)},
            u_color1: {type: 'v3', value: rgb(162, 138, 241)},
            u_color2: {type: 'v3', value: rgb(82, 31, 241)},
            u_time: {type: 'f', value: 0},
            u_randomisePosition: { type: 'v2', value: randomisePosition }
        },
        fragmentShader: sNoise + document.querySelector('#fragment-shader').textContent,
        vertexShader: sNoise + document.querySelector('#vertex-shader').textContent,
    });

    let mesh = new THREE.Mesh(geometry, material);
    mesh.position.set(0, 140, -280);
    mesh.scale.multiplyScalar(5);
    mesh.rotationX = -1.0;
    mesh.rotationY = 0.0;
    mesh.rotationZ = 0.1;
    scene.add(mesh);

    renderer.render( scene, camera );
    let t = 0;
    let j = 0;
    let x = randomInteger(0, 32);
    let y = randomInteger(0, 32);
    const animate = function () {
        requestAnimationFrame( animate );
        renderer.render( scene, camera );
        mesh.material.uniforms.u_randomisePosition.value = new THREE.Vector2(j, j);

        mesh.material.uniforms.u_color1.value = new THREE.Vector3(R(x,y,t/2), G(x,y,t/2), B(x,y,t/2));

        mesh.material.uniforms.u_time.value = t;
        if(t % 0.1 == 0) {
            if(vCheck == false) {
                x -= 1;
                if(x <= 0) {
                    vCheck = true;
                }
            } else {
                x += 1;
                if(x >= 32) {
                    vCheck = false;
                }

            }
        }

        // Increase t by a certain value every frame
        j = j + 0.01;
        t = t + 0.05;
    };
    animate();

});
    <script id="snoise-function" type="x-shader/x-vertex">
        vec3 mod289(vec3 x) { return x - floor(x * (1.0 / 289.0)) * 289.0; }
        vec2 mod289(vec2 x) { return x - floor(x * (1.0 / 289.0)) * 289.0; }
        vec3 permute(vec3 x) { return mod289(((x*34.0)+1.0)*x); }

        float snoise(vec2 v) {
            const vec4 C = vec4(0.211324865405187,  // (3.0-sqrt(3.0))/6.0
                                0.366025403784439,  // 0.5*(sqrt(3.0)-1.0)
                                -0.577350269189626,  // -1.0 + 2.0 * C.x
                                0.024390243902439); // 1.0 / 41.0
            vec2 i  = floor(v + dot(v, C.yy) );
            vec2 x0 = v -   i + dot(i, C.xx);
            vec2 i1;
            i1 = (x0.x > x0.y) ? vec2(1.0, 0.0) : vec2(0.0, 1.0);
            vec4 x12 = x0.xyxy + C.xxzz;
            x12.xy -= i1;
            i = mod289(i); // Avoid truncation effects in permutation
            vec3 p = permute( permute( i.y + vec3(0.0, i1.y, 1.0 ))
                + i.x + vec3(0.0, i1.x, 1.0 ));

            vec3 m = max(0.5 - vec3(dot(x0,x0), dot(x12.xy,x12.xy), dot(x12.zw,x12.zw)), 0.0);
            m = m*m ;
            m = m*m ;
            vec3 x = 2.0 * fract(p * C.www) - 1.0;
            vec3 h = abs(x) - 0.5;
            vec3 ox = floor(x + 0.5);
            vec3 a0 = x - ox;
            m *= 1.79284291400159 - 0.85373472095314 * ( a0*a0 + h*h );
            vec3 g;
            g.x  = a0.x  * x0.x  + h.x  * x0.y;
            g.yz = a0.yz * x12.xz + h.yz * x12.yw;
            return 130.0 * dot(m, g);
        }
    </script>
    <script id="vertex-shader" type="x-shader/x-vertex">
        uniform float u_time;
        uniform vec2 u_randomisePosition;

        varying float vDistortion;
        varying float xDistortion;
        varying vec2 vUv;

        void main() {
            vUv = uv;
            vDistortion = snoise(vUv.xx * 3. - u_randomisePosition * 0.15);
            xDistortion = snoise(vUv.yy * 1. - u_randomisePosition * 0.05);
            vec3 pos = position;
            pos.z += (vDistortion * 35.);
            pos.x += (xDistortion * 25.);

            gl_Position = projectionMatrix * modelViewMatrix * vec4(pos, 1.0);
        }
    </script>

    <script id="fragment-shader" type="x-shader/x-fragment">

        vec3 rgb(float r, float g, float b) {
            return vec3(r / 255., g / 255., b / 255.);
        }

        vec3 rgb(float c) {
            return vec3(c / 255., c / 255., c / 255.);
        }

        uniform vec3 u_bg;
        uniform vec3 u_bgMain;
        uniform vec3 u_color1;
        uniform vec3 u_color2;
        uniform float u_time;

        varying vec2 vUv;
        varying float vDistortion;

        void main() {
            vec3 bg = rgb(u_bg.r, u_bg.g, u_bg.b);
            vec3 c1 = rgb(u_color1.r, u_color1.g, u_color1.b);
            vec3 c2 = rgb(u_color2.r, u_color2.g, u_color2.b);
            vec3 bgMain = rgb(u_bgMain.r, u_bgMain.g, u_bgMain.b);

            float noise1 = snoise(vUv + u_time * 0.08);
            float noise2 = snoise(vUv * 2. + u_time * 0.1);

            vec3 color = bg;
            color = mix(color, c1, noise1 * 0.6);
            color = mix(color, c2, noise2 * .4);

            color = mix(color, mix(c1, c2, vUv.x), vDistortion);

            float border = smoothstep(0.1, 0.6, vUv.x);

            color = mix(color, bgMain, 1. -border);

            gl_FragColor = vec4(color, 1.0);
        }
    </script>
#canvas, canvas {
    position: absolute;
    top: 0;
    left: 0;
    width: 100%;
    height: 100%;
}

body {
  background: black;
}
所以我开始了,就像任何拥有基本 CSS 渐变的人一样。CSS 渐变曾经是一项非常新的技术,但现在得到了主要浏览器的广泛支持,但是对于仍在使用 Internet Explorer 的任何人来说,将背景标记作为备份总是好的。
    background: rgba(0,0,0,1);
    background: linear-gradient(315deg, rgba(0,0,0,1) 0%, rgba(255,255,255,1),1) 100%);
这看起来不错,但这并不是我想要的最终效果。所以接下来我决定尝试使用 Javascript 动画渐变效果。
为了创建 Javascript 动画渐变背景效果,我使用了 three.js
开始——three.js#
我在这个实验中使用 three.js,因为它使 WebGL 变得非常简单。首先,我在同一文件夹中创建了一个名为 index.html 的新文件和另一个名为 script.js 的文件。在 index.html 中,粘贴以下空心 HTML 结构。
概念 WebGL 如果您对此一无所知,那么它是一个相当难以抗拒的概念,因为我在开始渐变填充之旅之前并不了解它。据我所知,一个成功的 WebGL 基本上包含三个部分——两个着色器和一些 Javascript 来操作生成的形状。#
什么是着色器?#
正如我们在此描述的,着色器本质上是调整 3D 渲染输出的函数。它们是在屏幕上以 3D 形式呈现某些内容时发生的一系列任务的一部分。
这些着色器之一称为顶点着色器——这将调整页面上的每个“顶点”点。它基本上遍历每个点,并根据您在函数中的内容进行调整。另一个是片段着色器。将此视为调整页面上每个点的颜色。
着色器不是用 Javascript 编写的,它是用 GLSL 编写的,这是一种类似 C 的语言,由 three.js 直接传递给你的 GPU。您可以将这些直接粘贴到 HTML 页面的 <body /> 中。对于习惯用Javascript写的人来说,这些shader看起来很洋气,但基本上分解成几个关键块。
- snoise() 或单纯形噪声是我们两个着色器中用于生成噪声或随机顶点的函数。您将看到它是如何工作的,但在我们的顶点着色器中,我们调整每个点的 x 和 z 位置以创建类似布料的效果。我是怎么想到这个的?事实证明,很多人以前都试过这个。请在此处查看所有着色器噪声函数:https://gist.github.com/patriciogonzalezvivo/670c22f3966e662d2f83
- 统一变量是我们可以使用 three.js 直接从 Javascript 实时操作的变量。我们在下面的代码中定义它们,只需在 Javascript 中更新它们,我们就会更新页面上的 3D 形状(这是本次实验中最酷的发现)
- gl_Position 和 gl_FragColor 是控制着色器最终输出的保留变量。
- vUv 和 uv 是携带我们当前正在调整的顶点信息的变量。
了解更多信息的最佳方法是下载本文中的文件并尝试更改着色器和 Javascript 中的一些内容。下面是着色器的最终输出,您可以将其直接粘贴到 HTML 正文中:
    <script id="snoise-function" type="x-shader/x-vertex">
        vec3 mod289(vec3 x) { return x - floor(x * (1.0 / 289.0)) * 289.0; }
        vec2 mod289(vec2 x) { return x - floor(x * (1.0 / 289.0)) * 289.0; }
        vec3 permute(vec3 x) { return mod289(((x*34.0)+1.0)*x); }

        float snoise(vec2 v) {
            const vec4 C = vec4(0.211324865405187,  // (3.0-sqrt(3.0))/6.0
                                0.366025403784439,  // 0.5*(sqrt(3.0)-1.0)
                                -0.577350269189626,  // -1.0 + 2.0 * C.x
                                0.024390243902439); // 1.0 / 41.0
            vec2 i  = floor(v + dot(v, C.yy) );
            vec2 x0 = v -   i + dot(i, C.xx);
            vec2 i1;
            i1 = (x0.x > x0.y) ? vec2(1.0, 0.0) : vec2(0.0, 1.0);
            vec4 x12 = x0.xyxy + C.xxzz;
            x12.xy -= i1;
            i = mod289(i); // Avoid truncation effects in permutation
            vec3 p = permute( permute( i.y + vec3(0.0, i1.y, 1.0 ))
                + i.x + vec3(0.0, i1.x, 1.0 ));

            vec3 m = max(0.5 - vec3(dot(x0,x0), dot(x12.xy,x12.xy), dot(x12.zw,x12.zw)), 0.0);
            m = m*m ;
            m = m*m ;
            vec3 x = 2.0 * fract(p * C.www) - 1.0;
            vec3 h = abs(x) - 0.5;
            vec3 ox = floor(x + 0.5);
            vec3 a0 = x - ox;
            m *= 1.79284291400159 - 0.85373472095314 * ( a0*a0 + h*h );
            vec3 g;
            g.x  = a0.x  * x0.x  + h.x  * x0.y;
            g.yz = a0.yz * x12.xz + h.yz * x12.yw;
            return 130.0 * dot(m, g);
        }
    </script>
    <script id="vertex-shader" type="x-shader/x-vertex">
        uniform float u_time;
        uniform vec2 u_randomisePosition;

        varying float vDistortion;
        varying float xDistortion;
        varying vec2 vUv;

        void main() {
            vUv = uv;
            vDistortion = snoise(vUv.xx * 3. - u_randomisePosition * 0.15);
            xDistortion = snoise(vUv.yy * 1. - u_randomisePosition * 0.05);
            vec3 pos = position;
            pos.z += (vDistortion * 35.);
            pos.x += (xDistortion * 25.);

            gl_Position = projectionMatrix * modelViewMatrix * vec4(pos, 1.0);
        }
    </script>
    <script id="fragment-shader" type="x-shader/x-fragment">

        vec3 rgb(float r, float g, float b) {
            return vec3(r / 255., g / 255., b / 255.);
        }

        vec3 rgb(float c) {
            return vec3(c / 255., c / 255., c / 255.);
        }

        uniform vec3 u_bg;
        uniform vec3 u_bgMain;
        uniform vec3 u_color1;
        uniform vec3 u_color2;
        uniform float u_time;

        varying vec2 vUv;
        varying float vDistortion;

        void main() {
            vec3 bg = rgb(u_bg.r, u_bg.g, u_bg.b);
            vec3 c1 = rgb(u_color1.r, u_color1.g, u_color1.b);
            vec3 c2 = rgb(u_color2.r, u_color2.g, u_color2.b);
            vec3 bgMain = rgb(u_bgMain.r, u_bgMain.g, u_bgMain.b);

            float noise1 = snoise(vUv + u_time * 0.08);
            float noise2 = snoise(vUv * 2. + u_time * 0.1);

            vec3 color = bg;
            color = mix(color, c1, noise1 * 0.6);
            color = mix(color, c2, noise2 * .4);
            color = mix(color, mix(c1, c2, vUv.x), vDistortion);

            float border = smoothstep(0.1, 0.6, vUv.x);

            color = mix(color, bgMain, 1. -border);

            gl_FragColor = vec4(color, 1.0);
        }
    </script>
着色器代码在 HTML 中,尽管可以通过任何方式将其拉入 Javascript(例如,包含 Javascript 本身代码的变量)
Javascript#
我已经在顶部的代码笔中导入了 Three.js 文件,请记住,如果你想这样做,你的代码必须在服务器上。您不能只在浏览器中打开文件。您也可以为此使用您自己计算机的本地主机。
要更多地了解三个,您可以查看三个文档。本质上,我们需要创建一个相机(用于查看)、一个渲染器(用于将其全部显示在屏幕上)和一个场景(用于放置对象)。然后我们将在场景中放置一张纸或矩形。
这就是统一变量的用武之地。我们将在 Javascript 中定义它们,然后我们可以更新它们以使用 Javascript 改变渲染过程。我们这里还有一些其他的实用函数,所以请在 codepen 或最后的 git 中查看完整代码以获取更多信息。
    // Lets create a rendering process
    const renderer = new THREE.WebGLRenderer();
    // And make it full screen
    renderer.setSize( window.innerWidth, window.innerHeight );
    // And append it to the body. This is appending a <canvas /> tag
    document.body.appendChild( renderer.domElement )

    // Then lets create the scene and camera
    const scene = new THREE.Scene();
    const camera = new THREE.PerspectiveCamera( 75, window.innerWidth / window.innerHeight, 0.1, 1000 );
    camera.position.z = 5;

    let vCheck = false;
    var randomisePosition = new THREE.Vector2(1, 2);

    // This is the shader from earlier
    let sNoise = document.querySelector('#snoise-function').textContent
    // Lets make a rectangle
    let geometry = new THREE.PlaneGeometry(400, 400, 100, 100);
    // And define its material using the shaders.
    let material = new THREE.ShaderMaterial({
        // These are the uniform variables. If we alter these
        // They will update the rendering process, and the shape will change
        // in real time
        uniforms: {
            u_bg: {type: 'v3', value: rgb(162, 138, 241)},
            u_bgMain: {type: 'v3', value: rgb(162, 138, 241)},
            u_color1: {type: 'v3', value: rgb(162, 138, 241)},
            u_color2: {type: 'v3', value: rgb(82, 31, 241)},
            u_time: {type: 'f', value: 0},
            u_randomisePosition: { type: 'v2', value: randomisePosition }
        },
        fragmentShader: sNoise + document.querySelector('#fragment-shader').textContent,
        vertexShader: sNoise + document.querySelector('#vertex-shader').textContent,
    });

    // Now we have the shape and its material, we combine to make what is displayed on the screen
    let mesh = new THREE.Mesh(geometry, material);
    // We poisition it in our scene
    mesh.position.set(0, 140, -280);
    // And we scale it (so it is bigger or smaller)
    mesh.scale.multiplyScalar(5);
    // Lets rotate it a little bit too
    mesh.rotationX = -1.0;
    mesh.rotationY = 0.0;
    mesh.rotationZ = 0.1;
    // When we're done manipulating, we add it to the scene
    scene.add(mesh);

    // Finally we can render using both the scene and camera
    renderer.render( scene, camera );
如果将第 42 行 multiplyScalar(5) 调整为 multiplyScalar(1),您可以完全看到对象而无需大量放大。这会让您了解它是如何工作的,因为您会看到它只是一张纸被扭曲,渐变中产生的尖锐线条实际上只是纸张与自身重叠的部分。
好的 – 现在是动画。我们将使用 Javascript 动画帧,因为这个过程会变得非常 CPU/GPU 密集型。同样,这里的代码最少,我们可以重新渲染场景并为 requestAnimationFrame() 生成的每一帧更新其值。
    // we have two variables that we will use to generate the warp of the sheet
    let t = 0;
    let j = 0;
    // We will set x and y as random integers
    let x = randomInteger(0, 32);
    let y = randomInteger(0, 32);
    const animate = function () {
        // This function is the animation, so lets request a frame
        requestAnimationFrame( animate );
        // And lets re-render the image
        renderer.render( scene, camera );

        // Remember the uniform variables from earlier? Now we will update the randomisePosition
        // variable with the j variable, producing a random z and x position as shown in the shader
        mesh.material.uniforms.u_randomisePosition.value = new THREE.Vector2(j, j);

        // We will also generate a random R, G, and B value using R(), G(), and B(). The full code
        // can be found in the codepen or on the git.
        mesh.material.uniforms.u_color1.value = new THREE.Vector3(R(x,y,t/2), G(x,y,t/2), B(x,y,t/2));

        // And since we have t representing time, we will update time. Again, this will produce another
        // random input for adjusting the animation of the 3D object.
        mesh.material.uniforms.u_time.value = t;
        // Every 2 ticks of t, we will adjust x, so it never goes below 0 or above 32.
        if(t % 0.1 == 0) {
            if(vCheck == false) {
                x -= 1;
                if(x <= 0) {
                    vCheck = true;
                }
            } else {
                x += 1;
                if(x >= 32) {
                    vCheck = false;
                }

            }
        }
        // Increase t by a certain value every frame
        j = j + 0.01;
        t = t + 0.05;
    };
    // Call the animation function
    animate();
结论#
当我开始这个的时候,我知道我想要产生的效果,但不知道如何去做。您可以为此效果进行的应用和调整为网站背景、标题元素或类似内容提供了很大的灵活性。


![21 个最佳 Javascript IDE 和代码编辑器 [CSS、HTML、JavaScript] 21 个最佳 Javascript IDE 和代码编辑器 [CSS、HTML、JavaScript]](https://www.code8cn.com/wp-content/uploads/2022/10/image-219-150x150.png)

